Animated Pixel Art Tutorial [OC][CC][Tutorial]
🎙️ Sad-Crow · 416 points · Posted at 02:06:55 on July 12, 2015 · (Permalink)
Animated Pixel Art Tutorial

I'm using Photoshop CS4 for this tutorial. I'm sure other versions of Photoshop will work largely the same way.
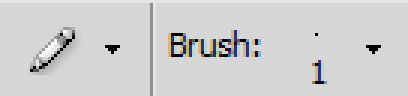
First things first: You want to be using the pencil tool! It's within the brush tool. Cycle through the brush options with Shift+B to find it.
The eraser tool also has a pencil mode, but it's accessed through the drop-down menu on the top bar.
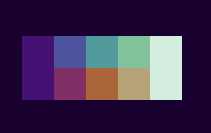
Make yourself a palette!
Here I have made two colour ramps that start and end with the same shadow and highlight. In this case because I was planning to draw an orc, I thought a green and a brown ramp would work best.
Look up some colour and light theory stuff to help build a ramp of your own! The fundamental points :
- Everything ramps down to the same "black" or deep shadow colour
- The most saturated area is the middle of the ramp, getting less saturated towards white
I learned to build this kind of ramp from either Niklas Jansen's site (http://androidarts.com/) or his twitter (https://twitter.com/AndroidArts). This guy's work is an invaluable resource, and anything I do is laughable next to this guy.
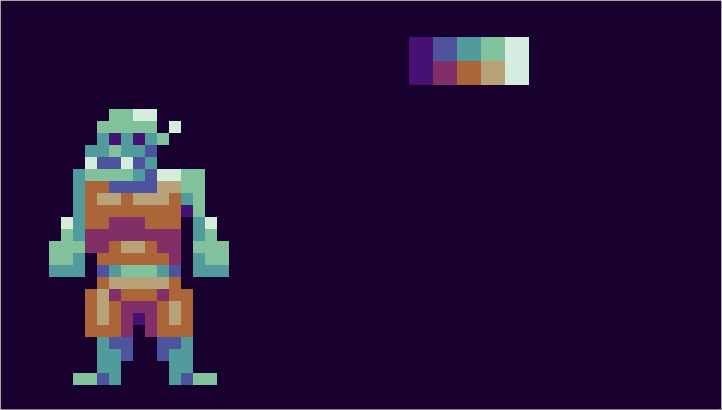
Okay, so I do a rough design using my palette.
There is a never ending all-out war regarding whether or not you should limit your colour palette or not. I don't really think it matters, myself.
In this case I am sticking 100% to my palette as it a) offers a fun challenge and b) means you never have to fret too hard about choosing the right colour.

Then I iterate on the design. I like to keep my other designs on the screen so I can see what works better or worse at a glance. Keep refining. You may find yourself going back to a previous design and branching in a different direction.
Also, keep everything as simple as possible.
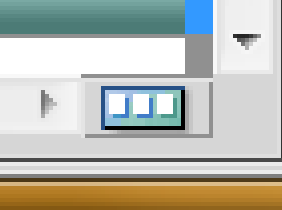
Now it's time for animation!
Make sure you're on frame animation and not timeline. You can switch by clicking on this button.
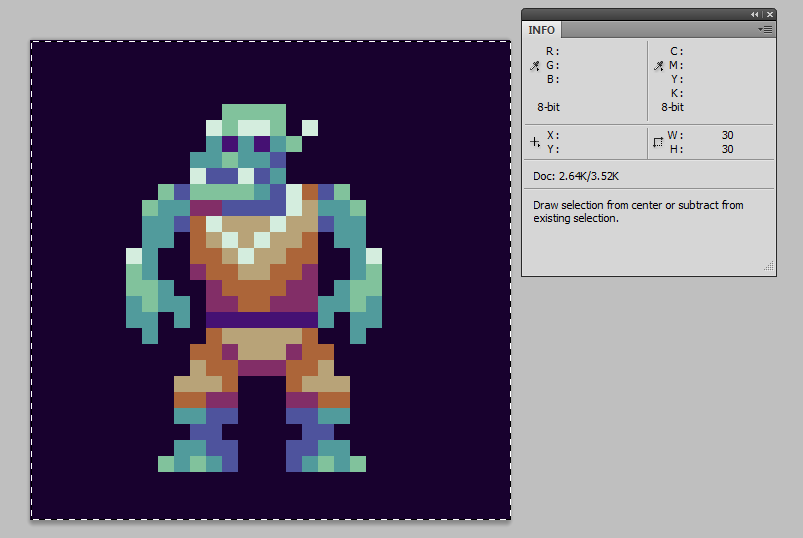
I'm making my canvas 30x30 px. I think that's a comfortable size to work, and if I were using this in a game I think I could work consistently in that size.
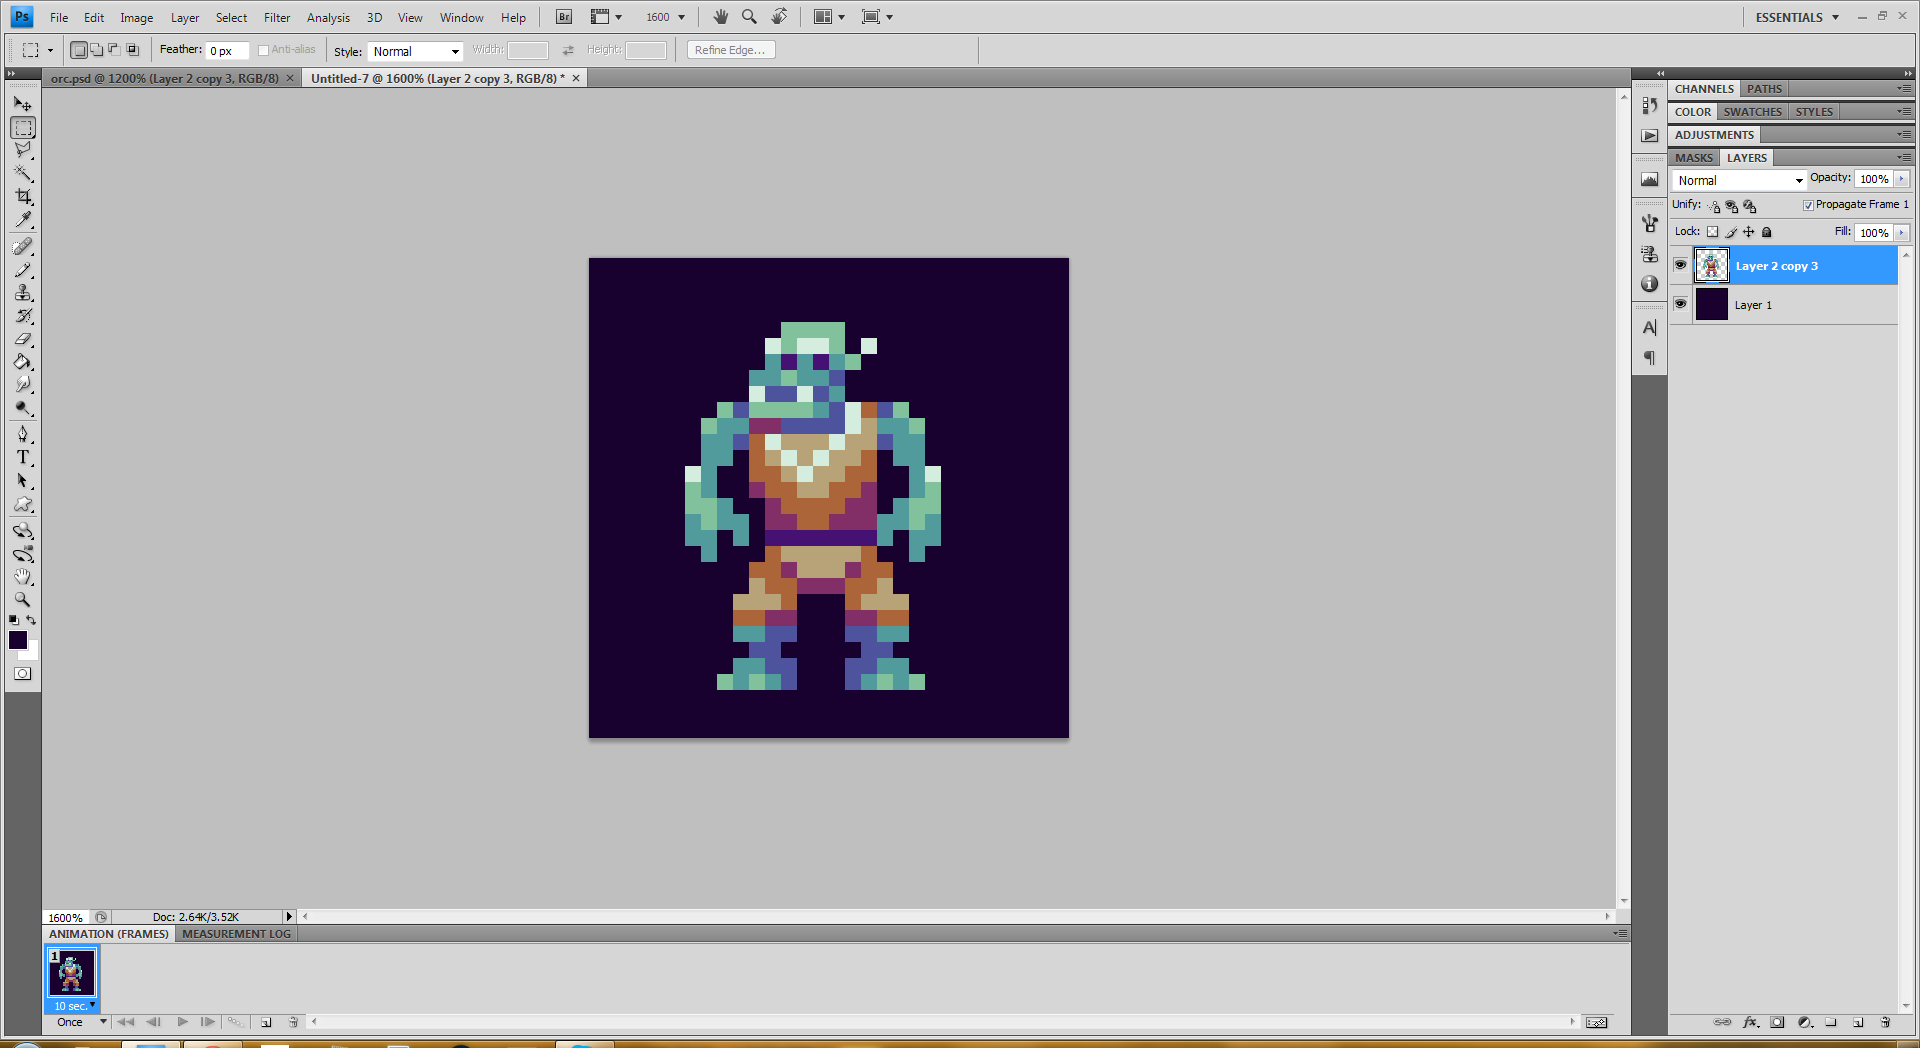
Here's what my setup looks like at the beginning.
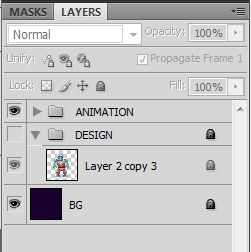
I'm going to make a folder with my design locked at the bottom of my layer stack. If I mess up and need to grab a copy of the design, it's in a convenient place.
It's locked so I don't accidentally mess it up.

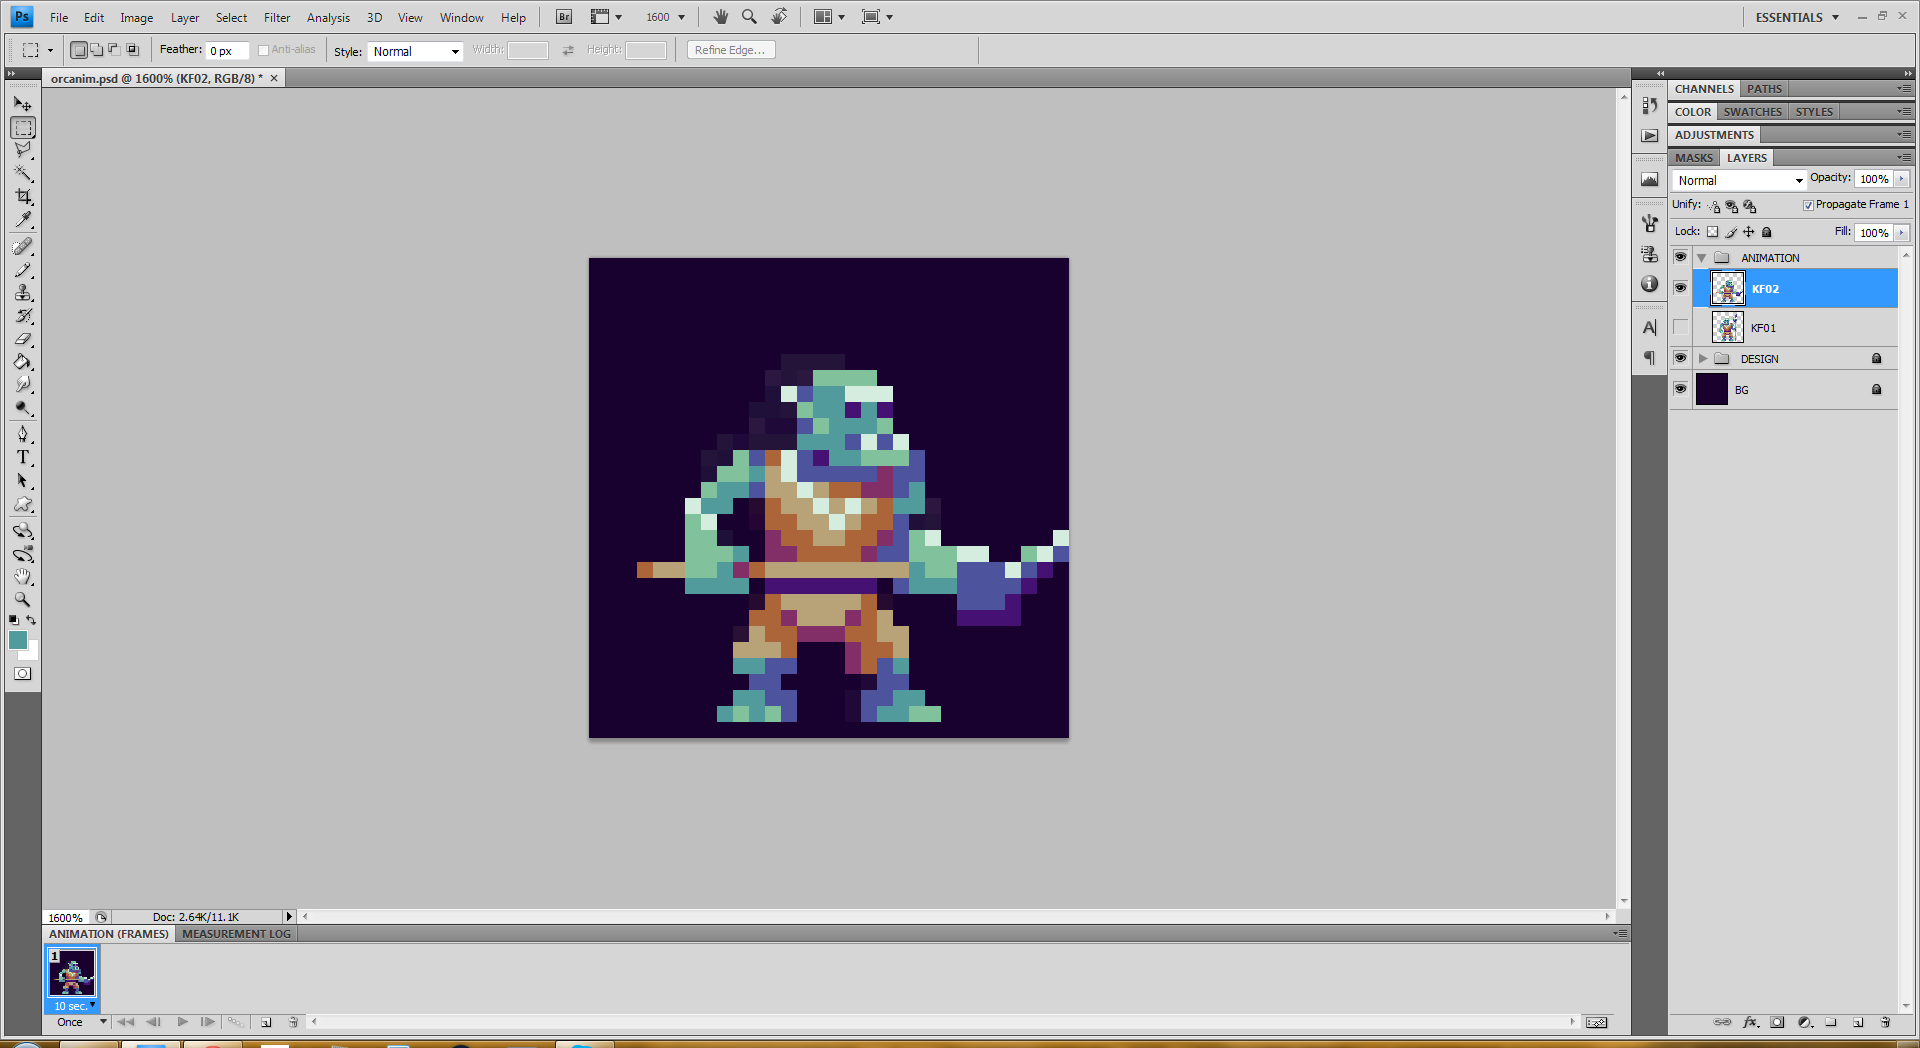
I decided to give him a weapon.
I imagine this guy is a guard NPC, so I'm going to do an "alerted" animation.
This will serve as my start frame.
Next I'll figure out what the final pose is going to look like. This might get tweaked, so I'm not getting too fussy with it. But it's important to have a good idea what where you're going to start and end.
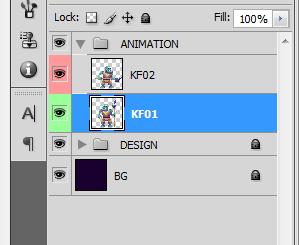
Name your frames something! This will make it easier to keep them organized.
I also like to colour them so I can tell what layer I have selected at a glance.
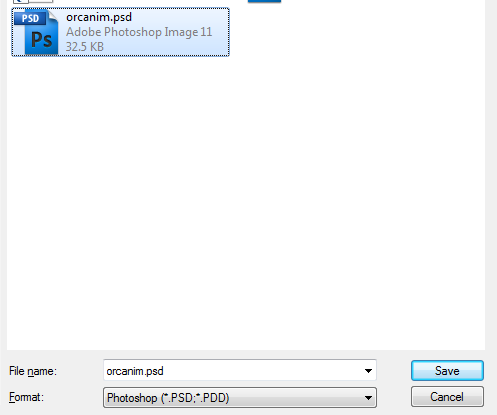
Save your work! Save often! Every time you pause, hit Ctrl+S. It'll save you heartache down the road.
We need some key poses. These are important poses we want the character to hit that will communicate what's happening.
In this animation I want our orc friend to be startled, then switch quickly to an attack pose.
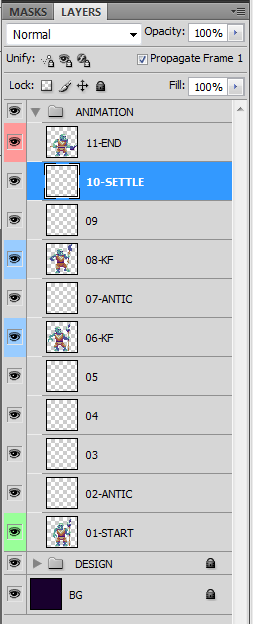
I like to think about my timing in the layers pane. If I want an action to be quick, I use fewer frames. Prolonged actions use more frames. Makes sense, right?
So in this case I want the startled action to be prolonged, and when he gets his wits about him he springs quickly into action. I'm actually going to use four inbetween for the first and second parts, but I know that I plan to hold the second keyframe for a few beats, so that'll give me the timing I want.
You'll notice that I'm renaming my layers as I go. Usually I skip this step, but it's a good practice to get into.

The inbetweens will start much rougher. These drawings are more concerned about selling the motion rather than good pixel art design. Silhouette is what you want to pay attention to at this stage, so I suggest using one colour.
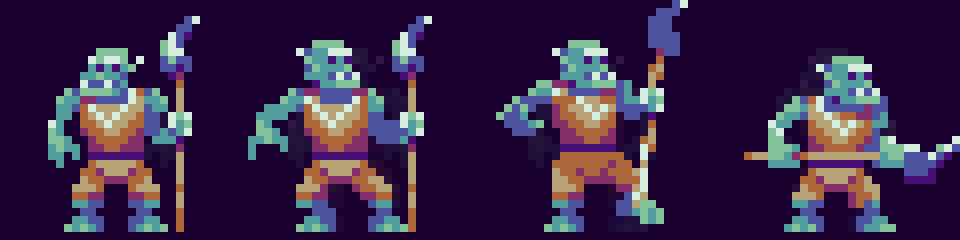
Here's what all of our drawing look like side-by-side so far. I don't work this way, but it's interesting to look at, and it help show us if our movements are making nice arcs.

I've finished roughing in the rest of the inbetweens. You'll notice that they are pretty rough, but the poses all read clearly. Below in the animation you will see that the movement is fairly smooth and readable, so I'm ready to move on to cleaning up the inbetweens.
You might notice in the third last frame I used a smear drawing. These are useful for selling quick movement. They can be tricky to use, but when pulled off properly they can add clarity and appeal.
You may also notice that I wound up adding another frame at the beginning. I thought a blink would be help sell the fact that he's being startled. Most people blink right before they turn their heads, and that's especially true when you're startled.

All clean!
This is probably the longest part of the process. If I were being really fussy I could spent way longer on the rough animation and do a lot of really cool stuff, but I chose not to here. After all, I'm not going to be using this for anything really.
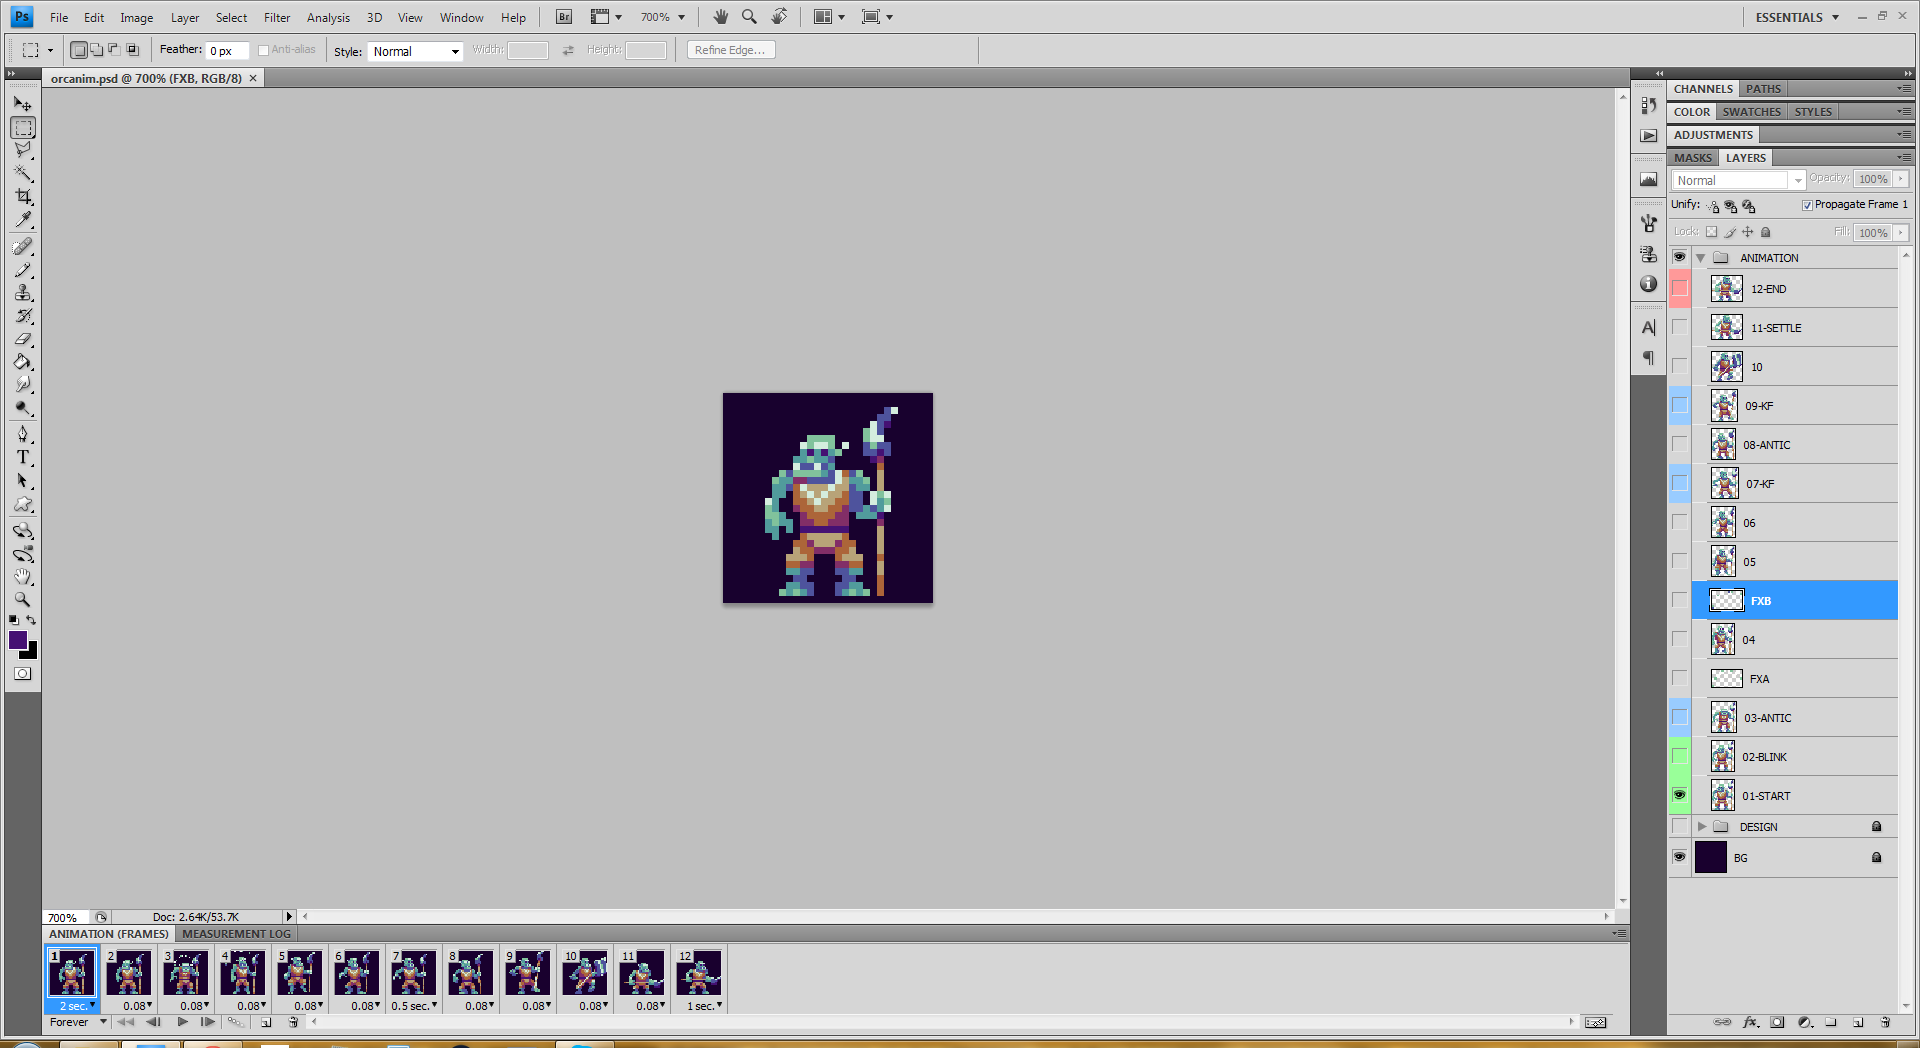
This is what my screen looks like at the end.
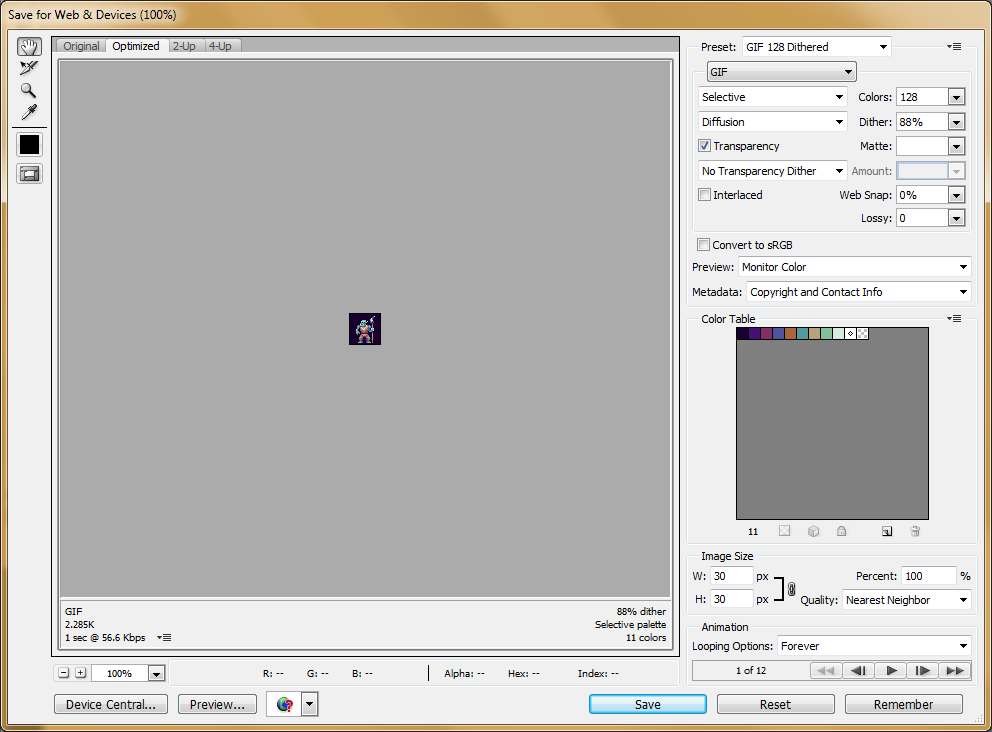
For animated .gif images I use the "Save for Web and Devices" dialogue window.
Make sure you have loop set to "Forever" and Quality set to "Nearest Neighbor." The quality setting ensures that if you scale up the image (I chose to scale to 300%), your pixel edges remain crisp. The other interpolation methods will make the edges fuzzy, which likely isn't what you want.
Enghiskhan · 30 points · Posted at 04:03:40 on July 12, 2015 · (Permalink)
Looks like a good opportunity to use reddit's save button.
🎙️ Sad-Crow · 11 points · Posted at 13:47:14 on July 12, 2015 · (Permalink)
blushes furiously
MallowCocktail · -6 points · Posted at 08:01:02 on July 12, 2015 · (Permalink)
I used to save stuff but i delete accounts often :(
aGoodGamingName · 7 points · Posted at 14:31:49 on July 12, 2015 · (Permalink)
Why would you delete accounts? I've only had one account before this and i changed account because i had a immature name, didn't delete it though.
ImpDoomlord · 8 points · Posted at 17:02:31 on July 12, 2015 · (Permalink)
Well at least now you have a good gaming name
MallowCocktail · 2 points · Posted at 17:44:59 on July 12, 2015 · (Permalink)
i just post to much stupid stuff and dont want my comments to be associated with old comments.
🎙️ Sad-Crow · 3 points · Posted at 13:48:03 on July 12, 2015 · (Permalink)
Maybe keep a "my saved stuff" account you never post on?
MallowCocktail · 2 points · Posted at 17:43:42 on July 12, 2015 · (Permalink)
but how else can i express my useless opinion ?
🎙️ Sad-Crow · 3 points · Posted at 18:35:18 on July 12, 2015 · (Permalink)
With a second account!
GameSaved · 2 points · Posted at 18:15:42 on July 14, 2015 · (Permalink)
I made and account just for saving game development posts, I just log into it whenever I see a post like this.
MallowCocktail · 1 points · Posted at 06:06:45 on July 17, 2015 · (Permalink)
nice
🎙️ Sad-Crow · 14 points · Posted at 02:19:41 on July 12, 2015 · (Permalink)
I made a promise in the comments of another post that I would do a tutorial on creating animated pixel art and exporting it as a .gif. This isn't the best tutorial that ever existed, but it's what I'm capable of.
If you want a crash course in classical animation I suggest picking up Richard Williams' book The Animator's Survival Guide. It's a comprehensive resource that runs you through all the basics and then some.
andorz · 5 points · Posted at 20:29:26 on July 12, 2015 · (Permalink)
I do a lot of pixel animation in Photoshop and have found it helpful to set key bindings for some timeline functionality. I use:
Being able to easily go back and forth between frames is often very useful.
This layout is mostly because of how my current keyboard looks. Also I have made these key bindings as custom actions bound to keys, as they are not available in the hotkey menu (at least when I last checked, might be wrong).
Just a quick tip. Nice tutorial /u/Sad-Crow, it should help a lot of people get started!
🎙️ Sad-Crow · 2 points · Posted at 12:14:05 on July 14, 2015 · (Permalink)
Ah, nice!
I have 'ctrl + <' and 'ctrl + >' to scrub back and forth, but I love the idea of a hotkey for creating a new frame. I had never thought of that! Thanks!
TR0J · 3 points · Posted at 10:34:58 on July 12, 2015 · (Permalink)
Great tutorial, I think you should consider crossposting this to /r/gamedev
🎙️ Sad-Crow · 3 points · Posted at 13:58:43 on July 12, 2015 · (Permalink)
I'll do that! Thanks!
ProbablySentient · 3 points · Posted at 12:49:38 on July 12, 2015 · (Permalink)
That's a really badass way of visualising in-betweens. If I ever have a hand in animating pixel art I'll definitely use this pipeline.
🎙️ Sad-Crow · 2 points · Posted at 14:01:02 on July 12, 2015 · (Permalink)
I hope you find it useful!
SteroidSandwich · 3 points · Posted at 14:19:51 on July 12, 2015 · (Permalink)
That was neat. Thank you for the tutorial
🎙️ Sad-Crow · 2 points · Posted at 14:36:28 on July 12, 2015 · (Permalink)
Thanks, and no problem!
aGoodGamingName · 3 points · Posted at 14:33:08 on July 12, 2015 · (Permalink)
This is really awesome, thanks! I should really use silhouettes more and this post inspired me to try my hand at animating an imp, off i go! :)
🎙️ Sad-Crow · 2 points · Posted at 14:36:01 on July 12, 2015 · (Permalink)
Hooray! Good luck!
Kinths · 5 points · Posted at 12:17:34 on July 12, 2015 · (Permalink)
Try out a program called PyxelEdit. It's built for Pixel art and animation.
🎙️ Sad-Crow · 4 points · Posted at 13:49:29 on July 12, 2015 · (Permalink)
I've been thinking about trying some other software. I'll check that out!
I am also wondering if there in anything good available for android or ios...
[deleted] · 3 points · Posted at 15:01:13 on July 12, 2015 · (Permalink)
For the ios there's sprite something. I haven't used it personally yet, but what other people say about it are pretty good. :)
BluShine · 2 points · Posted at 23:31:26 on July 12, 2015 · (Permalink)
I've used pixation on ios. It's usable, but not amazing. Good for playing with palettes or making little icons, but I wouldn't try to use it for real character animation.
Toromak · 1 points · Posted at 03:48:10 on August 3, 2015 · (Permalink)
PyxelEdit is not powerful enough for my tastes,try out MtPaint, it's excellent.
biesterd1 · 2 points · Posted at 03:29:32 on July 12, 2015 · (Permalink)
This is great! Thanks for this.
🎙️ Sad-Crow · 2 points · Posted at 13:50:27 on July 12, 2015 · (Permalink)
No problem! Thanks for checking it out!
mayonuki · 2 points · Posted at 04:31:06 on July 12, 2015 · (Permalink)
This is super-duper!
🎙️ Sad-Crow · 2 points · Posted at 13:50:51 on July 12, 2015 · (Permalink)
You're super duper!
thatsrealneato · 2 points · Posted at 05:05:57 on July 12, 2015 · (Permalink)
This is an awesome tutorial, thanks.
🎙️ Sad-Crow · 2 points · Posted at 13:51:13 on July 12, 2015 · (Permalink)
Thanks for your kind words!
wankers_remorse · 2 points · Posted at 05:28:30 on July 12, 2015 · (Permalink)
this is amazing. you're amazing. thanks for posting this
🎙️ Sad-Crow · 2 points · Posted at 13:52:54 on July 12, 2015 · (Permalink)
I am happy to! /r/pixelart is such a positive community, it's a pleasure to participate.
therest · 2 points · Posted at 07:45:11 on July 12, 2015 · (Permalink)
This is fantastic, thank you for sharing! I like the silhouette idea, I'll definitely try that out in the future.
🎙️ Sad-Crow · 2 points · Posted at 13:58:26 on July 12, 2015 · (Permalink)
Thank you! It has served me well. I'll sometimes use a second colour to help me track objects passing in front of each other (the spear passing in front of the body, for example). But generally the simpler, the better. Tests your silhouettes, and keeps you from feeling married to the drawing, since you haven't invested much time into it.
[deleted] · 2 points · Posted at 14:57:21 on July 12, 2015 · (Permalink)
This is one of the best tutorials on pixel art animation that I have stumbled upon! Thank you for making this wonderful tutorial. :D
I have a question though: how long did it take you to animate the sprite?
🎙️ Sad-Crow · 2 points · Posted at 16:38:07 on July 12, 2015 · (Permalink)
Thank you so much! I am flattered, and I'm glad it's useful!
I think the whole thing took around three or four hours to do? That isn't counting upload time and doing the writeup.
[deleted] · 2 points · Posted at 05:02:17 on July 13, 2015 · (Permalink)
Thank you for replying! You're really awesome bro. :D
Delicate-Flower · 2 points · Posted at 17:22:30 on July 12, 2015 · (Permalink)
Have you ever made assets for a game? Out of curiosity what would your rate be? This question is for many ppl here but I finally decided to ask now for some reason.
I would love to be able to make assets like this but truthfully it would take me forever.
🎙️ Sad-Crow · 3 points · Posted at 17:35:13 on July 12, 2015 · (Permalink)
I am sincerely flattered!
I actually work at a game studio full time. I'm afraid I don't have time for commissions these days.
Delicate-Flower · 1 points · Posted at 17:45:10 on July 12, 2015 · (Permalink)
Ha! I was just curious as to what it might cost. Sorry if it seemed like I was propositioning you.
Keep up the good work!
🎙️ Sad-Crow · 3 points · Posted at 18:44:12 on July 12, 2015 · (Permalink)
Oh, haha! Whoops!
Well I would typically charge a standard professional rate which would be between $25 to $40 CAD per hour depending on how long the contract is and how difficult the client seems :D
Delicate-Flower · 2 points · Posted at 21:18:50 on July 12, 2015 · (Permalink)
Thank you! That's a cool rate. If others here charged the same I think that is a good rate for both parties.
SnickleFritz_za · 1 points · Posted at 14:14:10 on July 14, 2015 · (Permalink)
That is really cool. Thanks so much for the tutorial. It helped me understand the process alot!